Monday, August 29, 2011

Curried Lentil & Tofu Cakes

Given my love for both lentils and cake-shaped things, I guess it shouldn't be much of a surprise that eventually I would try to make a cake-shaped thing out of lentils. I had also been wanting to make something with soft tofu, which until now I had never tried, so I tried combining the two. These cakes turned out very tasty, and with the addition or substitution of your favorite spices and herbs, the flavor is totally flexible.

By my system, this recipe made seven cakes, or about two dinner servings.

Ingredients:
1 cup cooked lentils
1/2 cup soft tofu
1/2 large onion, diced
3ish medium mushrooms, diced
1 small carrot, grated
1 clove garlic, diced
3/4 tsp curry powder
3/4 tsp ground coriander
1/4 tsp paprika
1/4 tsp cayenne pepper
Salt & pepper
Olive oil
Directions:
1. In a medium frying pan, heat about 2 tbsp olive oil over medium heat and saute mushrooms for about 5 minutes. Add carrot, onion and garlic and cook for another 5 minutes.
2. Add lentils, tofu, and spices and/or herbs. Season with salt and pepper and cook for another 10 minutes, or until mixture holds together in clumps, stirring regularly smooshing out tofu as needed. Let cool.
3. Once the lentil mixture is cool enough to handle, form into small patties, packing together well.
4. In the frying pan, heat about 2 tbsp of olive oil and cook patties for 5 minutes per side.
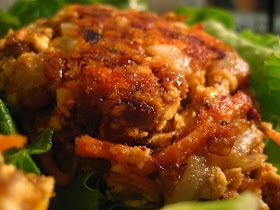
In truth, I used 1 cup of tofu, and not the 1/2 cup I've listed in the recipe. The flavor of these was great, but since I had a 50% break-apart rate while frying, the texture of the cakes definitely needed to be improved, which could probably be achieved by cutting the tofu back to 1/2 cup to let the clumpyness (for lack of a better term) of the lentils take hold. Still, they were quite tasty when pan-fried to a golden brown, and the crumbly rejects will be delicious with some scrambled eggs for lunch tomorrow.

Quote of the Day: Have a mouth as sharp as a dagger, but a heart as soft as tofu. ~ Chinese Proverb

Sunday, August 28, 2011

Quinoa & Bean Salad with Basil & Lemon

While she turned out to be a great big nothing in West Philadelphia (a little heavy rain and one windy day), Hurricane Irene was a weirdly grown-up experience for me. Getting ready for a potentially major weather event on my own between cautionary text messages from my Mom, I had many a flashback to my parents' old black GE radio, rummaging around for candles, and the excitement of when the power would go out. Though I know now that storms were surely less exciting for my parents, who were no doubt concerned with things like food spoilage and water supply, I have lots of fond memories of weathering storms with my family as a kid. On my own, though, the whole thing seemed a bit less fun.

Though quinoa is only non-perishable in its uncooked form, this seemed like a reasonable electric-free dinner recipe for pre-cooked quinoa. And even if you were to lose power, it would stay fresh for a while in your refrigerator for a while as long as you don't go around leaving the door open all willy-nilly.
This makes about 3-4 side-dish servings, or about 2 vegan main dishes.

Ingredients:
1 cup cooked quinoa (a little over 1/3 cup raw)
1/2 cup chickpeas or other beans, thoroughly cooked
1/2 red onion, finely chopped
1 bunch basil, stems removed and leaves chopped
Olive oil
Salt & pepper
Juice of 1 lemon

Directions:
1. In a large bowl, whisk together about 2 tbsp olive oil and the lemon juice and season with salt and pepper.
2. Add quinoa, chickpeas, onion and basil and mix well.
Feta optional
This salad is simple, fresh, delicious and nutritious, and a great make-ahead meal. For a little more color you might prefer to use kidney beans, navy beans, or something else that isn't coming to mind at the moment. And, while I love the simplicity of this salad, you could add just about any fresh veggies that you have on hand - cucumber, summer squash, or fresh corn, for example. Because I'm a slight carboholic, I had mine with a warmed, buttered naan-type bread and threw in a little stray Feta, but without these additions, this meal is vegan and gluten-free, and perfect for a summer lunch. Yum!


Quote of the Day: Red onions are especially divine. I hold a slice up to the singlight pouring in through the kitchen window, and it glows like a fine piece of antique glass. Cool watery-white with layers delicately edged with imperial purple...strong, humble, peaceful...with that fiery nub of spring green at the center. ~ Mary Hayes Grieco, The Kitchen Mystic

Wednesday, August 24, 2011

Marinated, Grilled Tempeh Steak & Green Salad

I won't try to convince you that there is anything that can really take the place of a deliciously juicy piece of beef. Even (or perhaps especially) if you are a staunch vegetarian who would never think of tasting any, I'm sure you would agree that it is singular and unique, and without substitute. But just for funsies, I keep on trying to find one in an ongoing effort to alleviate my meat-eating guilt.

I've had only one previous adventure in cooking with tempeh, but I was pleasantly surprised by its firm, meaty texture and slightly nutty flavor, and I still think it's among the best non-meat burrito fillings out there. Though I realize nothing can replicate the juicy grilled flavor of a rare steak, I nonetheless got the urge to soak it in Worcestershire sauce and grill it to see how far I could take the whole "fake meat" thing.
 I made mine with soy tempeh, but I don't see a reason why you couldn't use the multi-grain type. They say that one 8 oz. package is about two servings, which seemed about right to me.

Marinaded tempeh:
3 tbsp Worcestershire sauce
3 tbsp Soy sauce
1/4 cup vegetable broth
1 tbsp dark brown sugar
1 tsp cider, apple or white wine viengar
1/4 tsp paprika
1 clove garlic, minced or pressed
1 8 oz. package unseasoned soy tempeh

Directions:
1. 2-24 hours before mealtime, whisk together all marinade ingredients in a shallow dish or container. Cut tempeh in half, into two almost-square rectangles, and place in marinade, turning to coat. Cover and refrigerate until you are ready to start cooking, flipping one time near the middle of the marinading period.
4. Grease or spray and heat a grill pan, George Foreman Grill or regular grill. (I used a grill pan over medium heat). Grill for about 4-5 minutes each side, or until it gets nice dark grill marks. (I didn't do a great job of this, but I did get the crispy, salty-sweet bits of caramelized Worcestershire sauce, so all was not lost.)
 I've only just realized that in some places - I assume places with real grocery stores that don't tempt any halfway motivated cook to take up drinking wine in bed rather than continue to be disappointed in her shopping efforts - one can buy pre-seasoned tempeh. In concept I think this is great, since it soaks up flavors so well and lacks much flavor of its own when "untreated." I can't recommend them per se, but if anybody has adventures with seasoned tempeh, I want to hear about it!

I had initially planned to serve my tempeh with a green salad and some honey-glazed sauteed sweet potatoes, but when I cut into my monster of a sweet potato (which I bought only two days ago, by the way) I discovered that something small and gross had already started eating it. Imagine my chagrin. I was heavily chagrinned. I'm still a bit chagrinned about it, to be honest. Bleh. So instead, I had my tempeh on a Balsamic-dressed salad of arugula, green lettuce, cherry tomatoes, onion, Feta cheese and pine nuts, which I certainly cannot complain about. I added Feta on a whim but without it this is a yummy vegan meal.

I'm not sure I'm a great lover of tempeh, but it surely seems to have its place, if only in vegetarian burritos. Try it - it couldn't be easier!

Wednesday, August 17, 2011

Grilled Cheese Sandwiches with Cheddar, Dijon Mustard & Sauteed Balsamic Mushrooms

While I have had mixed experiences with their large cousins the Portobellos, I think those ordinary, decidedly-far-less-gourmet little white mushrooms are wonderful things. Maybe it's because they are so delicious, or because I know they're so healthy. Or maybe because they are already cleaned and sliced when you buy them. That might be the one.
Oozy deliciousness!
This is basically your traditional grilled cheese sandwich, with the addition of balsamic-marinated and sauteed mushrooms. Yum, right? This recipe makes one sandwich, and would make a great weekend lunch, though you probably don't need the recipe at all after the mushroom bit. Still, in the interest of consistency...

Ingredients:
4 oz mushrooms (1/2 box), cleaned and sliced
Deli roll or 2 slices multi grain bread
A few thin slices of mild cheddar or Swiss cheese
Balsamic vinegar 
1 clove garlic, smashed
Cooking spray
Dijon mustard
Salt & pepper
Olive oil

Directions:
1. In a small-medium frying pan, heat about 1 tablespoon of olive oil over medium heat, adding garlic and mushrooms. Saute for a couple of minutes, then add salt and pepper, and continue to saute until mushrooms are tender and nicely browned. This should take about 8-10 minutes, or more if you want yours extra browned.
2. Add about 1 tablespoon balsamic vinegar, immediately remove from heat, and mix to coat mushrooms. Heat a grill pan (over medium heat), sandwich press or George Foreman Grill, spraying with cooking spray.
3. Thinly butter your bread or rolls on the "outside" surfaces, and put a thin layer of dijon mustard on the "inside." Spoon mushroom mixture onto bread/roll (omitting the garlic), stack layers of cheese on top and top with other piece of bread or top of roll.
4. Grill your sandwich for about 5 minutes on each side, or longer if you like them extra-crispy, just be sure the cheese is melted. Slice in half and serve hot with extra Dijon mustard.

With a green salad, this was a delicious and very satisfying meal. I think that's why I like white button mushrooms more than Portobellos; I think that they tend to retain their "meaty" texture more, and have a more substantial mouthfeel. Or maybe I overcooked my Portobellos? I can't be sure, but now I have to try again. There are worse things!

Tuesday, August 16, 2011

3-Step Baked Quinoa "Mac" & Cheese from Vegetarian Times

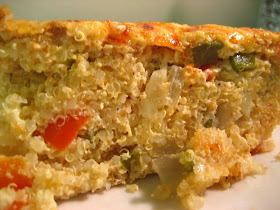
If there is a person alive who does not like macaroni and cheese, I hope never to meet them, because we would not be friends. I mean real rich-and-slightly-brown-on-top macaroni and cheese, not that weird gloopy chemical soup that tries to pass for macaroni and cheese. In my opinion, this quinoa mac and cheese is much closer to the "real" thing in its relative deliciousness than that runny, goopy, neon-orange tragedy. This baked cheesy quinoa is seriously nutritious besides being delicious, hearty and easy. Obviously cheese is not without it's nutritional downside (fat, duh) but the fiber and protein of the quinoa combined with the fiber and other good stuff in the veggies make up for that. In my imagination. Either way, it is a delicious and fairly balanced meal, and a great gluten-free alternative to mac and cheese. This recipe has the makings of serious comfort food.

The basis for this recipe came from VegetarianTimes.com, and I haven't changed it much, except to pare it down from a 9"x13" dish because 1) I love leftovers, but not that much and 2) My baking dish is 8"x8". If you're cooking for a crowd or only have a 9"x13" on hand, I'd just use the original. This will make about 4 meal-sized servings. If you're in my solo-dwelling position, you might want to cut it down further, but since I am a fan of the leftovers, I didn't.

Ingredients:
1 cup quinoa, rinsed thoroughly
1/2 green bell pepper, diced
1/2 red bell pepper, diced
1 1/2 cups cheddar cheese, grated (or a blend) plus more for sprinkling
1/4 large onion, chopped, or 1 medium leek, white and pale green parts halved and sliced
2 cloves garlic, minced
Salt and pepper
1 cup milk
2 eggs

Spices for sprinkling - I used about 1/4 tsp paprika and 1/2 tsp cumin

Directions:
1. In a medium saucepan, heat about 2 tablespoons of olive oil over medium heat. Add onion (or leek) and bell pepper, and saute for about 5 minutes, until tender. Stir in garlic and quinoa and cook for about 3-4 minutes, or until quinoa turns opaque.
2. Add 1 1/2 cups water, and add salt and pepper. Cover, turn heat down to medium-low, and simmer for another 3-4 minutes or until most of the liquid is absorbed. Remove from heat and let stand for 5 minutes.
3. Preheat oven to 350 degrees Fahrenheit. Coat the inside of an 8"x8" baking dish with cooking spray.Whisk together eggs and milk in a large bowl. Add in quinoa mixture and cheese. Transfer to baking dish, sprinkle with spices and cheese and bake for 30-35 minutes, or until edges and top are browned.

It will seem impossibly soupy going into the oven, but it will not come out that way! Mine wasn't getting quite browned enough for my taste so I ran it under the broiler for a couple of minutes at the end. Just be sure to let it sit for a reasonable amount of time before cutting into it. I have a tendency to skip this step and burn my face in my impatience. Don't be like me.

I used a mild white cheddar, but I see no reason why you couldn't use Swiss, or a blend of your favorites, if that's what's hanging around in your refrigerator. I also used soy milk instead of the regular type. I doubt this had much impact on the flavor, but you'll definitely want to check out the ingredients on your soy milk to make sure it's not sweetened, if you decide to go this route. If you are inclined to use an egg substitute and dairy-free cheese, this can definitely be made vegan-friendly.* Vegan or not, I expect that you could add almost any fresh veggies that you wanted. Peas and broccoli would probably be good choices. I had mine with ketchup and hot sauce.
This held together much better than I was expecting, but was also plenty moist.
And, since I can't seem to make a post without sheepishly admitting something weird that I did in the cooking process, this evening my admission is this: I forgot to get myself a cheese grater after the move, so instead of grating the cheese I slivered it into skinny little pieces as best I could. This doesn't much matter except for the fact that if you are measuring your cheese in volume, slivered cheese will take up a lot less space than grated, which is why I included the measurement in ounces for anyone else in my position of graterlessness.

Quote of the Day: How can anyone govern a nation that has two hundred and forty-six different kinds of cheese? ~ Charles de Gaulle

*Of course, what and how you eat is totally an individual decision, but many vegan cheeses (not so unlike many of the cheapest "regular" cheeses) are made mostly of soybean oil and palm oil combined with thickeners. I'm not hating, just recommending as always that everybody read their labels. Do yourself a favor on all fronts and use all-natural cheese!

Thursday, August 11, 2011

Crock Pot Southwestern Three-Bean Stew with Delicious Toppings

It's been said a million times before, but I'll say it again for good measure: Slow cookers are are a busy person's best friend. With a teeny bit of planning and an idea or two, you can have dinner hot and ready for you when you come in the door at night. Though the charming Stephanie O'Dea (better known as the Crock Pot Lady of Crockpot 365) has found a way to cook nearly anything you can think of in her slow cookers, and I do love her recipes, I still think there are a few things that are especially good when cooked all day long, and both beans and stews are on this list.
This stew has pinto beans, chickpeas and 2 types of lentils, but black beans, navy beans, black eyed peas or almost any other bean would also be delicious.
This seems like a ton of ingredients, but if you keep yourself stocked in spices, the odds are pretty good that you will have just about everything on hand. Also keep in mind that you can buy "bean soup mixes" of assorted beans, so my measurements on the bean front might be totally irrelevant. All the better (and easier) for you! So this is totally open to adaptation. I also ended up adding some red pepper flakes at the very end because I was afraid of throwing in too much cayenne earlier in the day. And there's always Sriracha!

For this recipe you will need a 2 or 3 qt crock pot, and some understanding of how it cooks. Some machines will need slightly more or less liquid for a similar effect based on temperature and the fit of the lid, but I would say as long as you've used yours a few times, you should have a good sense of this. This recipe seems to make about 3 servings.

Ingredients:
1/4 cup dry chickpeas
1/4 cup dry pinto beans
1/4 cup brown lentils
1/4 cup red lentils
1 medium red potato, cubed-ish
1/2 tsp cumin
1/2 tsp taco seasoning, or 1/4 tsp chili powder
1/2 tsp salt, seasoned or regular
1/4 tsp cayenne pepper
1/4 tsp paprika
1 envelope Saizon seasoning, cilantro and anchiote, made by Goya
1 clove garlic, smashed
1 jalapeno, diced and seeded
1 1/2 cups water or vegetable broth (subject to the behavior of your machine)
Cheese for topping (optional, but I used Monterrey jack)
1 green onion, thinly sliced
Fresh cilantro, to taste, torn
Tortilla chips (optional)

Directions:
1. The Day Before: Rinse, and soak beans in refrigerator, allowing plenty of room for them to expand (about 30% more space) and covering with at least two inches of water. Soak for 12-24 hours, changing the water at least twice in this period.
2. Place beans, spices, jalapeno, potato, garlic, and water or broth in the crock pot, and cook on "low" for about 9 hours. 
3. When beans are tender, serve and top with green onion, cheese and cilantro. Bonus points if you also serve tortilla chips for scooping.


The whole point of the crock pot is that you don't have to be home to check on it, but if you are, checking once in the afternoon will give you a better sense of how long it will really take. You can bump it up to "high" for a brief period if you need to, since most machines estimate that 1 hour on high is about equivalent to 2 1/2 hours on low. Handy! Though I don't recommend cooking it on "high" the whole time, since everything will get a bit mushy.

My verdict on this is "Good," but to me not great, since I think it could have used a bit more spice, but this is easily remedied. Use your favorite spices or try new ones, but if you ask me, the cheese and cilantro are crucial. Try this soup with some sliced avocado on top. Yum!

Quote of the Day: Society is like a stew. If you don't stir it up every once in a while then a layer of scum floats to the top. ~ Edward Abbey

Wednesday, August 10, 2011

15-Minute Penne with Tuna, Tomato & Black Olives

This dish wins in a lot of ways: It's nutritious, yummy, and super fast. Basically, the only downside is that it's way too much food for one person, which I guess isn't really a downside in and of itself. While leftover pasta never quite lives up to its former glory, I think this will make a very tasty lunch tomorrow.
Eating at my desk like the classy lassie that I am.
 I know some people aren't the biggest fans of black olives, and I can understand this. I hated them as a kid (except for when I was allowed to wear them on my fingers) and even now they are an occasional thing for me, but I feel like they really belong in this dish. If you're still not buying it, you can substitute for any other dark sort of olive, like kalamata, if you prefer. And if you still need convincing, I say this: They're good for you! No, seriously. Olives (which are technically fruits... weird) contain anti-inflammatory, anti-oxidant and anti-cancerous phytonutrients. So maybe give them another chance?

Ingredients:
1 cup (or to taste) sliced black olives 
1 can diced tomatoes (I used "Italian herbs," but you can use plain or another herby variety)
1 can solid white albacore tuna, drained
1 1/2 cups penne pasta
1 clove garlic, peeled and smashed
Salt and pepper
Olive oil
3ish sprigs of fresh parsley
Grated Parmesan cheese (optional)

Directions:
1. Cook your pasta according to the package directions.
2. Meanwhile, heat about 2 tablespoons of olive oil and the garlic over medium heat and cook for about 2-3 minutes. Add tomato, olives, tuna (breaking it apart), and a little salt and pepper. Cook over medium-low heat for about 5 minutes, or until the pasta is done, whichever comes first.
3. Drain your pasta, then add the tomato mixture to the pasta and toss.
4. Transfer the pasta to a bowl or serving dish, and garnish with parsley. Serve with grated Parmesan, if you like, and enjoy immediately.

I went very simple with the herbs, but you could certainly add some dried oregano and/or basil to the tomato mixture, or garnish with other fresh herbs in place of or in addition to the parsley. This dish feels "real" - yummy, but healthy and hearty - and is very easy at the end of a long day.

Obviously I tore up the parsley about twelve seconds later, but it looked pretty there for a sec, right? Also that is my 21st birthday happening in the background, in case you were wondering.


Quote of the Day: Except the vine, there is no plant which bears a fruit of as great importance as the olive. ~ Pliny the Elder

Tuesday, August 9, 2011

The New Guerilla Kitchen, or Why I Really Hope My Master's Degree is Worth It

Two days before the big move! Total chaos, but it all worked out wonderfully.
 My report on how Brady's Philly to Amherst move went could be described in one word: Change... ey. We enjoyed the road trip, got lots of help (in many forms) from both of our families, and when it was over, it was just Brady and me, for a very short time, in our future home. We made a quick run to Trader Joe's (only 10 minutes away!), and I made dinner with glorious local farmstand produce: Zucchini fritters, salad and native sweet corn on the cob. Brady finished setting up the electronics, and later we enjoyed an excellent beer (Dogfish Head, Raison d'Etre) and an episode of Star Trek: The Next Generation. Say what you like, this is still one of the best ways I can think of to spend an evening, except for the persistent fact that I would be leaving the next day. Brady and I have done long-distance before - it stinks big time, of course, but we figured it out. Obviously, though, living together for a year kind of spoils you. So we soaked up as much of each other's company as we could before I had to catch my bus to Philly, knowing full-well that it still wouldn't be enough to face the six weeks before we can get together.

I know, I'm so emo, but I see no other way to deal with this at the moment - except maybe cooking.

Most people have kitchen cabinets. I, Miss Fancypants, have a kitchen closet. That's right. My kitchen - or at least the sink, counter space, storage and small appliances - exist in a closet. In case you were wondering, the real difference between our last apartment and my studio is not all in my head. Sharing 715 sq feet on the 9th floor to trying to get comfortable (alone) in 220 sq feet on the first floor is kind of a big adjustment.
Kitchen Closet: Left. Don't even try to tell me that that isn't the tiniest coffee maker you've ever seen.
Kitchen Closet: Right


I am not yet fully frustrated with the kitchen arrangement, though I am certain that day will come. But the way I see it, this is the whole point of GK: To do the best you can with what you have, and find new ways to do things you thought you couldn't. It's about making something out of nothing, and this kinda feels like nothing.


In truth, with the notable exception of counter space, I have everything that I need: A range (electric, grumble grumble), an oven, a refrigerator, a sink and a microwave. As a bonus, I have my baby crock pot, and the internet, so if I can't keep cooking here, I can't call myself much of a Guerilla Anything. I'm going to keep cooking because I need to, to sustain myself physically, spiritually and personally, and until December, this is where I will be doing it.
 
And now, a few very artsy photos of the weekend in Western Massachusetts from Sebastian Ebarb (of Sebastian Ebarb Design):
From Left: Brady's parents, Amy and John Eskilson, Brady, Me, My mother Linda, and my sister Alexandra (Allie)
Oooh, landscapey.
Delicious "Harmony Springs" sodas made in Ludlow, MA and consumed at Cook Farm in Hadley, MA
I am probably not breaking new ground with any of you when I say that the farms, food and friendly people in the Amherst MA area are all amazing. I didn't think a year of city living had affected me that much, but when I had the opportunity to buy 13 beautiful, sweet ears of native corn from an equally sweet farm owner (for $4, by the way) about a hundred yards from where it was grown, I couldn't help but feel a little overwhelmed. This place is beautiful in every way, and once I move there, you might have a hard time getting me to live anywhere else. The "real-life" kitchen in our apartment doesn't hurt, either.